一、项目介绍
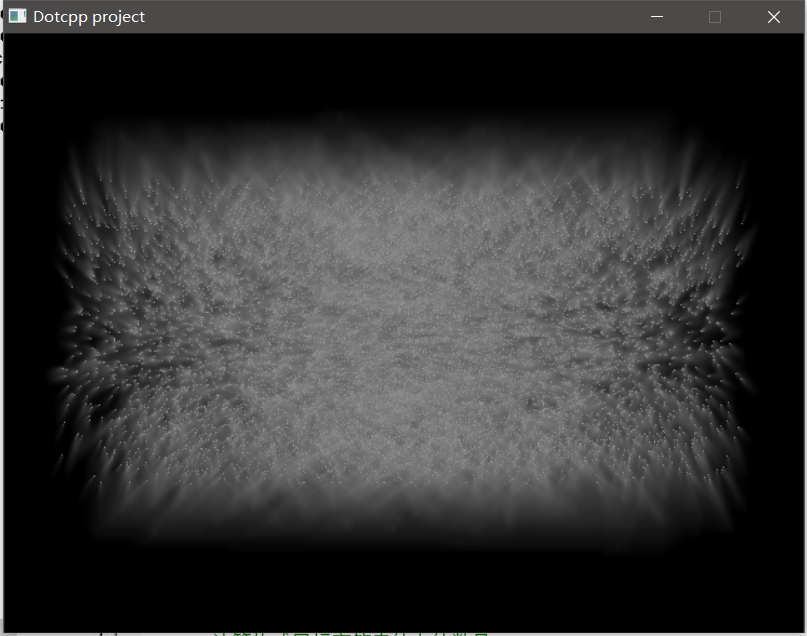
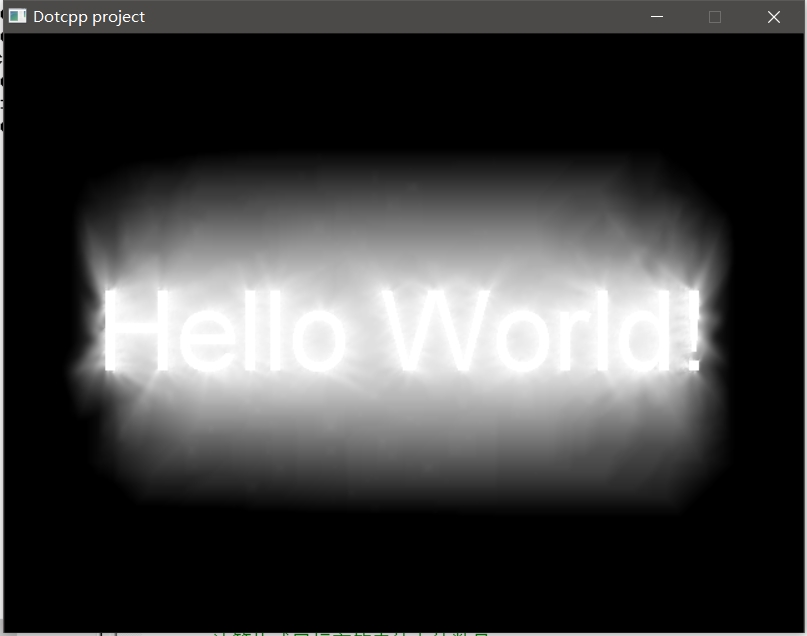
这是一个用C语言输出的艺术字“HelloWorld!”。
还记得你第一次用C语言输出“HelloWorld!”吗?很简单吧!
编译环境:VC6
第三方库:Easyx2022 注意需要提前安装easyX,如没有基础可以先了解easyX图形编程
二、运行截图


三、代码思路
1.引入图形库头文件
#include <graphics.h>
2.定义全局变量
POINT *g_pDst;
POINT *g_pSrc;
int g_nWidth;
int g_nHeight;
int g_nCount;
3.主函数
void main()
{
initgraph(640, 480);
DWORD* pBuf = GetImageBuffer();
GetDstPoints();
GetSrcPoints();
int x, y;
for (int i = 2; i <= 256; i += 2)
{
COLORREF c = RGB(i - 1, i - 1, i - 1);
Blur(pBuf);
for (int d = 0; d < g_nCount; d++)
{
x = g_pSrc[d].x + (g_pDst[d].x - g_pSrc[d].x) * i / 256;
y = g_pSrc[d].y + (g_pDst[d].y - g_pSrc[d].y) * i / 256;
pBuf[y * 640 + x] = c;
}
Sleep(5);
}
四、完整源码
#include <graphics.h>
#include <conio.h>
#include <time.h>
// 定义全局变量
POINT *g_pDst;// 点集(目标)
POINT *g_pSrc;// 点集(源)
int g_nWidth;// 文字的宽度
int g_nHeight;// 文字的高度
int g_nCount;// 点集包含的点的数量
// 获取目标点集
void GetDstPoints()
{
// 设置临时绘图对象
IMAGE img;
SetWorkingImage(&img);
// 定义目标字符串
TCHAR s[] = _T("Hello World!");
// 计算目标字符串的宽高,并调整临时绘图对象的尺寸
setcolor(WHITE);
setfont(100, 0, _T("Arial"));
g_nWidth = textwidth(s);
g_nHeight = textheight(s);
Resize(&img, g_nWidth, g_nHeight);
// 输出目标字符串至 img 对象
outtextxy(0, 0, s);
// 计算构成目标字符串的点的数量
int x, y;
g_nCount = 0;
for(x = 0; x < g_nWidth; x++)
for(y = 0; y < g_nHeight; y++)
if (getpixel(x, y) == WHITE)
g_nCount++;
// 计算目标数据
g_pDst = new POINT[g_nCount];
int i = 0;
for(x = 0; x < g_nWidth; x++)
for(y = 0; y < g_nHeight; y++)
if (getpixel(x, y) == WHITE)
{
g_pDst[i].x = x + (640 - g_nWidth) / 2;
g_pDst[i].y = y + (480 - g_nHeight) / 2;
i++;
}
// 恢复对屏幕的绘图操作
SetWorkingImage(NULL);
}
// 获取源点集
void GetSrcPoints()
{
// 设置随机种子
srand((unsigned int)time(NULL));
// 设置随机的源数据
g_pSrc = new POINT[g_nCount];
for(int i = 0; i < g_nCount; i++)
{
g_pSrc[i].x = rand() % 640;
g_pSrc[i].y = rand() % 480;
}
}
// 全屏模糊处理(忽略屏幕第一行和最后一行)
void Blur(DWORD* pMem)
{
for(int i = 640; i < 640 * 479; i++)
{
pMem[i] = RGB(
(GetRValue(pMem[i]) + GetRValue(pMem[i - 640]) + GetRValue(pMem[i - 1]) + GetRValue(pMem[i + 1]) + GetRValue(pMem[i + 640])) / 5,
(GetGValue(pMem[i]) + GetGValue(pMem[i - 640]) + GetGValue(pMem[i - 1]) + GetGValue(pMem[i + 1]) + GetGValue(pMem[i + 640])) / 5,
(GetBValue(pMem[i]) + GetBValue(pMem[i - 640]) + GetBValue(pMem[i - 1]) + GetBValue(pMem[i + 1]) + GetBValue(pMem[i + 640])) / 5);
}
}
// 主函数
void main()
{
// 初始化
initgraph(640, 480);// 创建绘图窗口看
DWORD* pBuf = GetImageBuffer();// 获取显示缓冲区指针
GetDstPoints();// 获取目标点集
GetSrcPoints();// 获取源点集
// 运算
int x, y;
for (int i = 2; i <= 256; i += 2)
{
COLORREF c = RGB(i - 1, i - 1, i - 1);
Blur(pBuf);// 全屏模糊处理
for (int d = 0; d < g_nCount; d++)
{
x = g_pSrc[d].x + (g_pDst[d].x - g_pSrc[d].x) * i / 256;
y = g_pSrc[d].y + (g_pDst[d].y - g_pSrc[d].y) * i / 256;
pBuf[y * 640 + x] = c;// 直接操作显示缓冲区画点
}
Sleep(5);// 延时
}
// 清理内存
delete g_pDst;
delete g_pSrc;
// 按任意键退出
_getch();
closegraph();
}
C语言网提供由在职研发工程师或ACM蓝桥杯竞赛优秀选手录制的视频教程,并配有习题和答疑,点击了解:
一点编程也不会写的:零基础C语言学练课程
解决困扰你多年的C语言疑难杂症特性的C语言进阶课程
从零到写出一个爬虫的Python编程课程
只会语法写不出代码?手把手带你写100个编程真题的编程百练课程
信息学奥赛或C++选手的 必学C++课程
蓝桥杯ACM、信息学奥赛的必学课程:算法竞赛课入门课程
手把手讲解近五年真题的蓝桥杯辅导课程